
Hello there, it is Verity here from Pretty Little Button for the Bumbleberry Design team. Today’s post is all about creating two sets of birthday cards using the same techniques, but one tailored more as masculine and the other more feminine. What’s more, I’ve also created a box for each set so these could easily be given as a gift set for someone to use so make sure you check those out at the end.
Video tutorial Creating masculine and feminine birthday card sets:
Written and photos Creating masculine and feminine birthday card sets:
To start off with, we're going to create organic watercolour backgrounds using a selection of Altenew stencils. However, before you apply the watercolour, we're first going to dry emboss the stencil design into the watercolour card. To do this, tape the stencil over your watercolour card stock.

Next, run this through your die-cutting machine with it set up to emboss and not cut. This may vary from machine to machine, so make sure you refer to your manual. For my machine, I need to use the platform, plat B, a cutting plate, then a silicone embossing mat, my cardstock and then stencil and then another cutting mat. If the impression is light, add a piece of cardstock as a shim.

Now, you can check that the stencil has dry embossed, but do not remove the stencil from the card yet. With the stencil still in place, start to add the watercolour over the top. You could remove stencil, but I find with it in place can add some extra texture to the background.

So, using a round brush to add water over the panel before dropping colour in. For these cards, I used my Altenew watercolour 36 pan. For the masculine backgrounds, I went for blues, greens and teals as this blend well. At times, I also dropped some black in to add a little more depth.


Again, once the layers were complete, go back and heat emboss the outline layer in Platinum, gold and silver metallic powders. All of the cakes were cut out ready to assemble on the cards.

To ground, the stamped images on the card, heat emboss the diamond and square Geo Frames stamp in matching metal embossing powders on to the black card.
For the feminine cards, die-cut the Fine Frames rectangle and circle dies in gold and silver mirror card stock.


For the masculine card, use Double Denim Gina K cardstock to create the box and lid. However, to add some more detail to the lid heat emboss the Broken Chevron stencil over the top, around the edge of the window and heat set in Gold embossing powder.
Now, I went back with the Feeling Dotty Stencil to add a little ink blending with Sugared Lavender Catherine Pooler Ink to the feminine lid to tie it in.
Shopping list for Creating masculine and feminine birthday card sets:
Links to supplies at Bumbleberry Papercrafts Shop:
 Gina K Designs - Connect Glue Shop at: BP |
 Neenah Classic Crest Solar White 80lb Cardstock Shop at: BP |
 Scrapbook Adhesives 3D foam squares 1/4" white Shop at: BP |
 Original MISTI - My Sweet Petunia Shop at: BP |
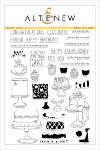 Cake Love - Altenew Shop at: BP |
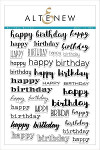 Birthday Builder - Altenew Shop at: BP |
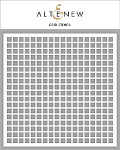 Grid Stencil - Altenew Shop at: BP |
 Geo Frames Dies - Altenew Shop at: BP |
 Geo Frames Stamp - Altenew Shop at: BP |
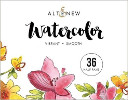 Watercolour 36 Pan Set - Altenew Shop at: BP |
 Teflon Bone Folder - Lawn Fawn Shop at: BP |
 Broken Chevron Stencil - Altenew Shop at: BP |
 Feathered Leaves Stencil Shop at: BP |
 Blue Denim Heavy weight cardstock - Gina K Shop at: BP |
 Layered Cupcake - Altenew Shop at: BP |
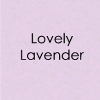 Lovely Lavendar Heavyweight Cardstock - Gina K Designs Shop at: BP |
 Wavy Grid Stencil - Altenew Shop at: BP |
 Feeling Dotty Stencil - Altenew Shop at: BP |
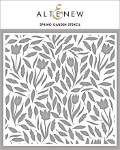 Spring Garden Stencil - Altenew Shop at: BP |
If you enjoyed this post and create a card like this, make sure you share it in the Bumbleberry Craft Room on Facebook for us to check it out!
Until next time!
Verity


Very nice cars…I love the embossing technique. Also have a Grand daughter named Verity