
Hello there, it is Verity here from Pretty Little Button for the Bumbleberry Design team. Today's post takes a look at creating 2 for 1 cards within stencils and ink sprays. This is such a great way to get more from a stencil, change the design slightly and also not let your ink spray go to waste! I'm featuring the lovely Fine Tulle stencil but any stencil you have in your stash will easily work. I've paired it with a graphic style and use bold die-cut sentiments to finish the cards off.
Written and photos Simple mixed media card with stencils - 2 for 1!
Start off by temporarily adhering the Altenew Fine Tulle stencil down over a piece of white card.
Next, spray the panel with an ink spray colour of your choosing. I went for Altenew Se Glass ink spray giving the panel a good coverage. I also gave the panel a light spray of Altenew Antique Silver spray to add a little variation.
Remove the stencil and let this panel dry. Do not clean the stencil off, instead place another card panel over the inked side of the stencil. Press down firmly over the stencil and lift the panel up. This will have transferred the stencilled design over to the other card panel.
Once both panels have dried, die-cut out a circle and a rounded rectangle from each panel. This will create the foal element to add the sentiment on. To get even more, you could use the left of die-cut panels and turn these into cards as well.
For the rounded rectangle die-cut, first of all ink blend Hot Tub ink and Sea glass ink through the Fine Tulle stencil with blending brushed. This just adds a little extra to the card.
In addition, add a few strips of Delicate Stripes Washi Tape to the background. Foam mount the die-cut shape onto the from. For the sentiment, add Altenew Double-sided adhesive sheets to black card. Die-cut a sentiment from these and layer up for dimension. The 'Miss you' comes from the Altenew All about you word die set - coming soon to the shop!
For the circle card, add the die-cut to a white card base popped up for dimension. In addition, die-cut the PinkFresh studio Sentiment Suite Hello die out of black card, layering up for dimension.
Lastly, finish both cards with black Nuvo drops to embellish the card.
If you enjoyed today's card, please let us know and we would love to see your cards if this has inspired you.
Shopping list for TITLE:
Links to supplies at Bumbleberry Papercrafts Shop:

Gina K Designs - Connect Glue
Shop at:
BP
|
Neenah Classic Crest Solar White 110lb Cardstock
Shop at:
BP
|

Neenah Classic Crest Solar White 80lb Cardstock
Shop at:
BP
|
Scrapbook Adhesives 3D foam squares 1/4" white
Shop at:
BP
|

Original MISTI 2 - My Sweet Petunia
Shop at:
BP
|

Hot Tub Ink - Catherine Pooler Designs
Shop at:
BP
|
Hot Tub Reinker - Catherine Pooler Designs
Shop at:
BP
|

All About You Word Die Set - Altenew
Shop at:
BP
|

Seaglass Ink - Catherine Pooler Designs
Shop at:
BP
|
Seaglass Reinker - Catherine Pooler Designs
Shop at:
BP
|

Fine Tulle Stencil - Altenew
Shop at:
BP
|

Antique Silver Ink Spray - Altenew
Shop at:
BP
|

Sea Glass Ink Spray - Altenew
Shop at:
BP
|

Double-sided adhesive sheets - Altenew
Shop at:
BP
|
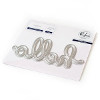
Sentiment Suite: Hello Die - PinkFresh Studio
Shop at:
BP
|
|
If you enjoyed this post and create a card like this, make sure you share it in the Bumbleberry Craft Room on Facebook for us to check it out!
Until next time!
Verity

Pretty Little Button Blog | Instagram | Facebook | Youtube


